TinyMCE
First thing to say TinyMCE is a very popular WYSIWYG online based editor. It’s very widely used in the web, as may already know it it’s part of the default WordPress installation. Out of the web, of course, there are some other editors as well. The most used and well developed projects are the Yahoo!’s YUI 2 Rich Text Editor and CKEditor also known with his past name – FCKEditor.
Before I proceed with this post, let me say that I’m working and this tutorial is based on version 3.1.1 released on 18 Aug 2008.
Including TinyMCE
The only thing you’ve to do is to include a TinyMCE javascript file and write a simple init. The examples of installing it come with the compressed version of the javascript file:
<script src="/scripts/tinymce/jscripts/tiny_mce/tiny_mce.js"></script> <script> tinyMCE.init({ mode : "textareas", theme : "advanced", force_br_newlines : true, theme_advanced_buttons1 : "link,unlink,|,bold,italic,underline,strikethrough,|,justifyleft,justifycenter,justifyright,justifyfull,|", theme_advanced_buttons2 : "", theme_advanced_buttons3 : "", theme_advanced_buttons4 : "", theme_advanced_toolbar_location : "top", theme_advanced_toolbar_align : "left", theme_advanced_statusbar_location : "", theme_advanced_resizing : true }); </script> |
The result of this code is shown on the picture:
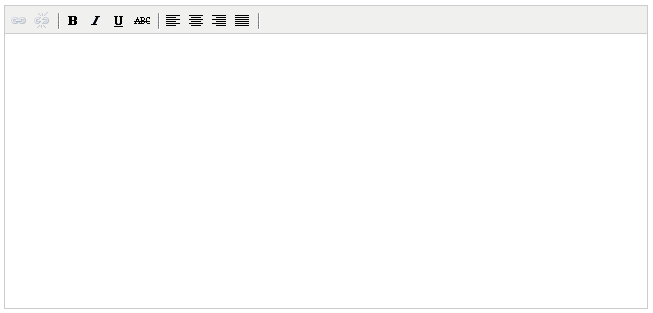
However for this tutorial you’ve to include the uncompressed file, because the compressed one is impossible to read and modify. At the end of all this you can compress yet again the resulting file with some js compressor as YUI Compressor, JSMin or Google Closure Compiler. So instead of including the file above, you’ve to include the _src version as it is:
<script src="/scripts/tinymce/jscripts/tiny_mce/tiny_mce_src.js"></script> |
Adding the Button
Now there is a small configuration object passed to the init function. First you’ve to modify it a bit:
tinyMCE.init({ mode : "textareas", theme : "advanced", force_br_newlines : true, theme_advanced_buttons1 : "link,unlink,|,bold,italic,underline,strikethrough,|,justifyleft,justifycenter,justifyright,justifyfull,|,mybutton", theme_advanced_buttons2 : "", theme_advanced_buttons3 : "", theme_advanced_buttons4 : "", theme_advanced_toolbar_location : "top", theme_advanced_toolbar_align : "left", theme_advanced_statusbar_location : "", theme_advanced_resizing : true }); |
Usually in the /tinymce/jscripts/tiny_mce/themes/advanced/editor_template_src.js file there are some buttons described:
tinymce.create('tinymce.themes.AdvancedTheme', { // Control name lookup, format: title, command controls : { bold : ['bold_desc', 'Bold'], italic : ['italic_desc', 'Italic'], underline : ['underline_desc', 'Underline'], strikethrough : ['striketrough_desc', 'Strikethrough'], justifyleft : ['justifyleft_desc', 'JustifyLeft'], justifycenter : ['justifycenter_desc', 'JustifyCenter'], justifyright : ['justifyright_desc', 'JustifyRight'], justifyfull : ['justifyfull_desc', 'JustifyFull'], bullist : ['bullist_desc', 'InsertUnorderedList'], numlist : ['numlist_desc', 'InsertOrderedList'], outdent : ['outdent_desc', 'Outdent'], indent : ['indent_desc', 'Indent'], ... |
What you need to do is simply to add a new line to this config array:
...
        blockquote : ['blockquote_desc', 'mceBlockQuote'],
	mybutton : ['mybutton_desc','myFunc']
}, |
That’s not enough of course! Now TinyMCE sees this definition, but nothing happens. It cannot build the new button yet. What’s next?
Styling the Button
After giving the new button a name, TinyMCE constructs a markup with the given name into the controlbar:

<td> <a title="advanced.mybutton_desc" onclick="return false;" onmousedown="return false;" class="mceButton mceButtonEnabled mce_mybutton" href="javascript:;" id="mce_0_mybutton"> <span class="mceIcon mce_mybutton"></span> </a> </td> |
This name can be simply used in the CSS file (/tinymce/jscripts/tiny_mce/themes/advanced/skins/default/ui.css) to style the button. Because TinyMCE uses sprite for its background images, you can copy/paste the style from some other button and than adjust the background position, only after you’ve added the new icon to the sprite. Here’s simply a copy of the style from another button:
... .defaultSkin span.mce_numlist {background-position:-80px 0} .defaultSkin span.mce_mybutton {background-position:-460px 0} .defaultSkin span.mce_justifyleft {background-position:-460px 0} ... |
You can see how the button appears in the control bar!

Binding the Button
The final job to do is to bind the button with some action. This thing happens again in /tinymce/jscripts/tiny_mce/themes/advanced/editor_template_src.js. You just have to search for other bindings – let’s say mceCleanup. There you can write your new function – myFunc:
FormatBlock : function(ui, val) { ... }, myFunc : function() { this.editor.selection.setContent('Hello World!'); }, mceCleanup : function() { ... }, |
Now after clicking the button the method will be executed. 
Note that the name of the method should be exactly the same as described in the controls array in /tinymce/jscripts/tiny_mce/themes/advanced/editor_template_src.js. If not the button wont work ever.
Final Steps
Now you’ve to compress (if you wish) the js files and deploy your editor.
Woha! Thats a really complicated way of doing it and not very safe for future upgrades of the software.
This is much easier:
Custom toolbar button example.
Hi!
Where is the new icon (gif,png)? Wich path?
Thanks!
Thanks for posting this TinyMCE tutorial 🙂
Check out TinymceSupport.com for more tutorials!
Hey Stoimen,
Thanks a lot. You have made my doubts clear. Keep posting more such posts.
Thank you for this – I look forward to an update for TMCE 4.0!